Not exactly a project I wanted to do, but one I decided I would try. Auto repair is not my strong suit, but there are many basic repairs that a person can do on their own car.
In my case, on my 2006 Chevy Cobalt, there were a rubber bushings on both sides that had dry rotted and separated, and they needed to be replaced for the car to pass inspection.
After going down the youtube rabbit hole, I felt pretty encouraged and decided to give it a try. What needed to be done was relatively simple:
Remove the tire
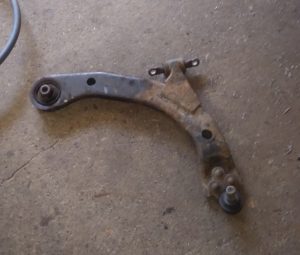
Remove the control arm, or at least get the end with the bushing exposed
Use a bearing press to remove the old part
Use a bearing press to insert the new part
Put it all back together
With that in mind I took the project on. Now, being a novice at auto repair, what I didn’t recognize was the many steps inbetween those steps. Things I didn’t even think were going to be steps. Unexpected mishaps, stubborn rust, and not having quite the right tool for the job.
Getting the tire off was straightforward. Even getting most of the control arm connections was easy. There are 3 places the control arm connects to: two points on the subframe and one point on the wheel assembly. There are 4 bolts total to remove before it is loose.
My first approach was to only remove two of the three connections and pivot the bushing so it was accessible. I had seen someone do this in a video, so I knew it was possible. It proved to be too difficult though, and I gave up on that approach after hours of fighting it. My best guess was the shock spring was creating a lot of strain and making it hard to get a good angle to get the bushing out.
After giving up on this approach, trying to reassemble things also proved more difficult that advertised, again because of the spring. The bolts on the subframe weren’t aligned enough to engage properly, so I eventually figured out I needed to use a spring compressor to relieve some of the pressure so I could get it into alignment. Using a spring compressor is easily one of the most terrifying things I’ve done, and thinking back I wish I had been wearing a faceshield and stood more out of the way in case that thing let go.
An additional note on assembly: all of the bolts have specific torque values they should be tightened to. I looked this up through AutoZone’s site, they have a bunch of the technical documents and details for that.
Okay, so lesson learned. The spring is a problem, and I can’t ignore it. The next time I went in, I removed all the bolts and moved the strut out of the way. Even then it still took some finangling to get the control arm out, but I got it.
The bearing press tool wound up being a crapshoot. It was a loaned kit from an auto parts store with a bunch of different sizes. Of course the size I needed wasn’t there, so I rummaged around the shop and found some scrap pipe that juuuust fit.
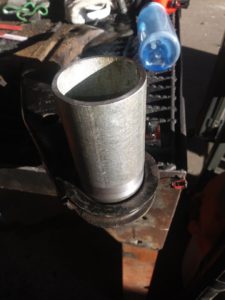
For the removal and installation to go well, the pipe size has to match the outer diameter of the bushing. Can’t press on the inner section or you’ll tear up the rubber. Can’t press on the rubber either. And it is a VERY tight fit, so the amount of force required is substantial.
Removal wasn’t too terrible on the first one, I think I managed to press it out on the first try (it might have needed a little encouragement with the air hammer). One important thing: the hole in the control arm is TAPERED, so the bushing goes in one way, and it has to be removed the other way.
I bungled the first attempt at installing the new one. Luckily I bought two. What happened was basically not being careful enough when aligning the bushing and instead of going straight into the hole it started going diagonally. Once that happened it crushed one side, and that was not fixable by my abilities. After some swearing, I did some more video-watching and learned someone used a light amount of oil when installing theirs. That seemed iffy, but it was worth trying. Between that and being extra careful, it went in straight and true!
Alright, that’s that. Got the control arm reinstalled, and since I was already familiar with how that goes it went pretty smooth. I couldn’t replace the other one right away since I wrecked one of the two I bought, so I bought another two (just in case) and tried it again when the parts came in.
Things were going pretty ok until I got to the bolt for the bushing. This one was being incredibly difficult and I couldn’t figure out why. Eventually the signs were obvious, it was spinning in place and was probably stripped.
After about 8 hours, I finally figured out what was REALLY going on and what to do about it. Using the camera on my phone I got a look up and around the bracket to see this.
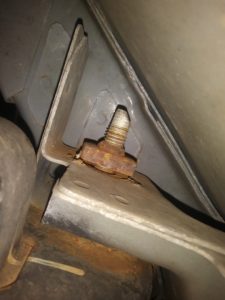
The threaded portion was just this square nut that had (at one point) been welded to the subframe, but had since let go. It must have corroded enough so that when I used the impact wrench to loosen the bolt it jerked the nut free. Unfortunately this was in an incredibly tight spot, and the nut was very stuck on there. I struggled with that for another 3 hours or so and had a brilliant though – I’ll just weld it back in place! I can’t fit a wrench in there, but I can fit a MIG welder gun in there.
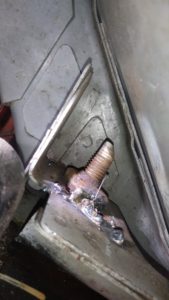
Not my proudest work, but that was enough. I worked slowly and used a lot of PB blast, and thankfully that was enough. Until I went to remove the bushing, which was also substantially rusted and had fused to the bolt. The rubber had also separated from the center steel part and spun freely. I could move the bolt only so far because of the way the bushing assembly is.
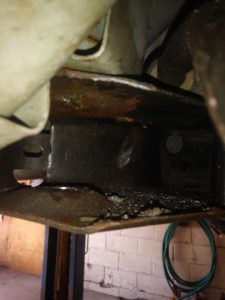
Here is a picture of the subframe where the bushing goes into (bushing not pictured).
I’ll keep a long story from getting much longer and summarize the rest:
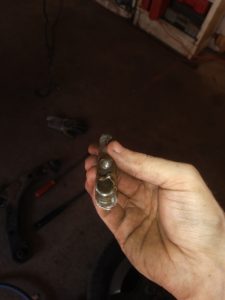
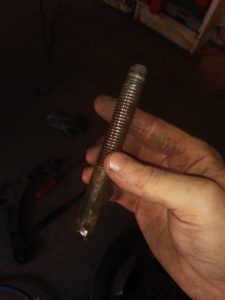
I cut away as much of the bushing as I could (the rubber and outer steel part), then I get some vice grips to hold onto the remaining piece of the bushing that the bolt was stuck to. Then I started a lot of drilling, trying to hollow out the bolt until it was no longer attached to the bushing. When drilling out bolts, I start with a small diameter to make an easy pilot hole as deep as I can, and gradually increase in size.
Eventually this paid off, and I got something that looked like this.
Since I destroyed that bolt, I went out and bought a replacement, and went through the process of cleaning up the rust on the control arm, getting the new bushing in, and getting it all back together. I was a pro at the reassembly at this point, so that went well.
0/10, would not do again.