Majora’s Mask made of foam
Being a child of the 90s, I grew up playing video games. I was usually behind the current trends since our family couldn’t afford to spend a ton of money on video games, but when I eventually got to play Legend of Zelda: Majora’s Mask, it was instantly one of my all time favorites.
I’ve always wanted to make numerous items from the LoZ games – the master sword, an ocarina, a fairy in a jar that could save me from the brink of death, all of that. But I typically didn’t have the money to be putting into those types of projects.
Well years later, when I wasn’t broke and had access to a CNC Router, I decided a fun project would be creating Majora’s Mask out of foam. This was a couple of months before the local halloween parade, so I figured it could be a fun project that I could show off. There are numerous 3D files out there for the mask – the one I probably used was by ferreusveritas on Thingiverse.
My strategy was to make it as large as I reasonably could, at least to obscure my whole face. It also needed to not take forever to cut, as I knew 3D carvings on a CNC router take an awful long time and I don’t like babysitting the machines.
I scaled it to be about 14″ wide by 12″ tall, and about 2″ deep. It’s as tall as my head is, but more than twice as wide. Before that I also removed the spikes, as they stick out very far and I didn’t want to have to carve out a lot of extra foam for that. The spikes can be made separately in a much shorter time, and ultimately I just made some paper cones and glued them on.
Below is the foam on the CNC in various stages. It was so satisfying to watch.
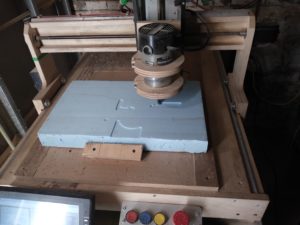

The first pass was using a 1/4″ endmill and taking some fairly deep passes. If memory serves it was 1/2″ depth of cut per pass. Foam like this cuts SO WELL, I had no idea. First time working with it and it was magical. I was able to really turn up the feedrate too.
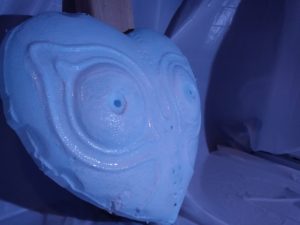
The second pass was using a 1/4″ ball endmill to get the smooth curves of the mask. My stepover was maybe 1/8″, and it did wind up leaving a bunch of ridges, but after a bit of sanding and some compromises due to a short timeframe I got it good enough.


Glorious! The carving went great for a first-time attempt at a new material, and for something this size. There were a couple of issues though. I must have set the starting depth a little too high, and it wound up leaving some flat spots on the highest parts where it didn’t cut. Not being much of a perfectionist, I figured I could sand it and blend it in. There was also a small hole that was revealed after carving in the bottom-left side of the mask, but that’s easy enough to fill in with glue.
To free the mask from the block, I cut around it using a bandsaw with a narrow blade and followed just outside the shape. I then sanded down the edges.
The backside of the mask was going to be cut on the CNC as well, but for time’s sake I decided I would just carve it out manually. Mostly I used one of those long retractable utility knives and took many V-shape cuts. It started with larger chunks, and bit by bit was cut down into smaller chunks. Once it got close I started to sand it to be roughly the same shape as the outside of the mask. Appearance didn’t matter since it would be the backside, but it should sit evenly on my face so I couldn’t leave it too misshapen.
To prepare the foam for painting, I had already learned from a previous project that spray paint and foam DO NOT MIX. Or rather, they do mix. The solvents in spray paint mix especially well with foam and begin to dissolve it. To avoid that, I first covered the entire thing in a few layers of elmers glue (mod podge would have also worked). This creates a good seal over the foam, and does not react to spray paint. It took a few days between coats due to the long dry time – it was a lot of glue.
Once I felt confident I didn’t leave any bare spots, I took it outside and spray painted the whole thing in black.

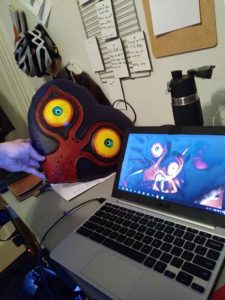
For the details, rather than try to spray paint and mask it all (ba-dum-psh) I went for a brush type paint. Not having much experience, I figured acrylic paint would be easiest. For practice I 3D printed the file I used at a very small scale.
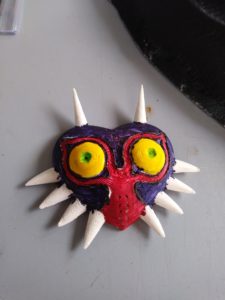
With that I was able to do some color-matching with small amounts of acrylic paint, and I got a general understanding of the ratios of colors I needed to mix to get the main details down.
After that I went full-scale and mixed up a bunch of paint.
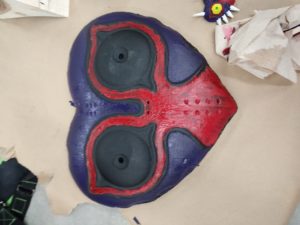
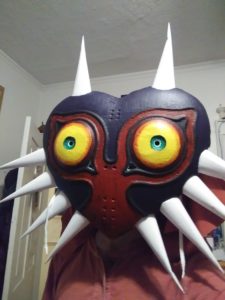
And here is the “finished” paint job, or the final paint job I put on it. There were many smaller details that I decided I didn’t have time for, as the halloween parade was quickly approaching.
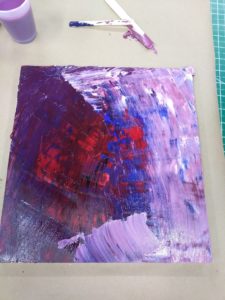
I had quite a bit of leftover paint, mostly from the larger sections of the mask, so I decided to make some abstract art. Rather than using brushes I just smeared it with some wood scraps onto a square of plywood. I actually still have this hanging up on my wall.
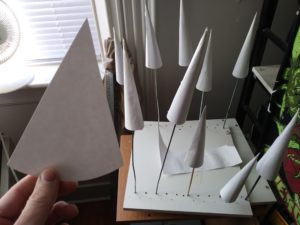
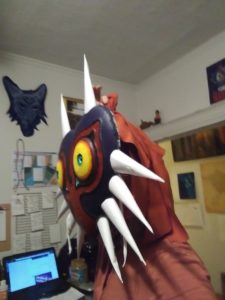
So now that the mask was painted, I was still missing a big piece of the mask: the spikes! That should be the easy part, just make some paper triangles and wrap them into a cone shape. Well it took some trial and error, but I eventually got it to the shape and size I wanted. I wrapped them into shape, taped them, then coated them in elmers glue so they could be painted as well. The paper is less susceptible to spray paint, but very susceptible to being wet in general. I used acrylic paint for these, but even acrylic paint can dampen the paper and deform them, hence the elmers glue coating.
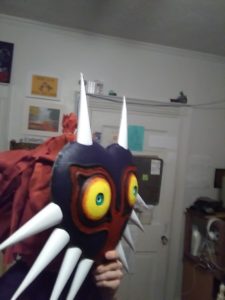
Once all the cones were dry and stiff, they needed to be attached to the mask. An elegant solution was to cut a groove in the foam and then gently cram the open end of the cone into the groove. I believe I added some elmers glue to the area to help it stay in place.

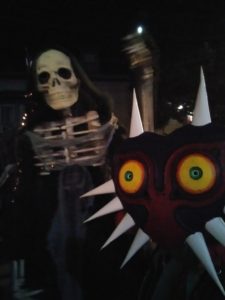
Attached all the cones, attached some string on the backside so it can be worn and… it’s ready for halloween!
All in all, it was a very fun project. I got to make something from one of my favorite childhood games, I used a CNC router to make something large, got some practice painting, did a lot of kludging to get things to work, and had a lot of fun walking in the halloween parade with it. There was some more to the costume I didn’t cover in this article, mostly picking out some clothes that match the character’s colors, making some quick gloves and a shoddy hat, covering some normal shoes with orange cloth.
You’ve met with a terrible fate, haven’t you?